

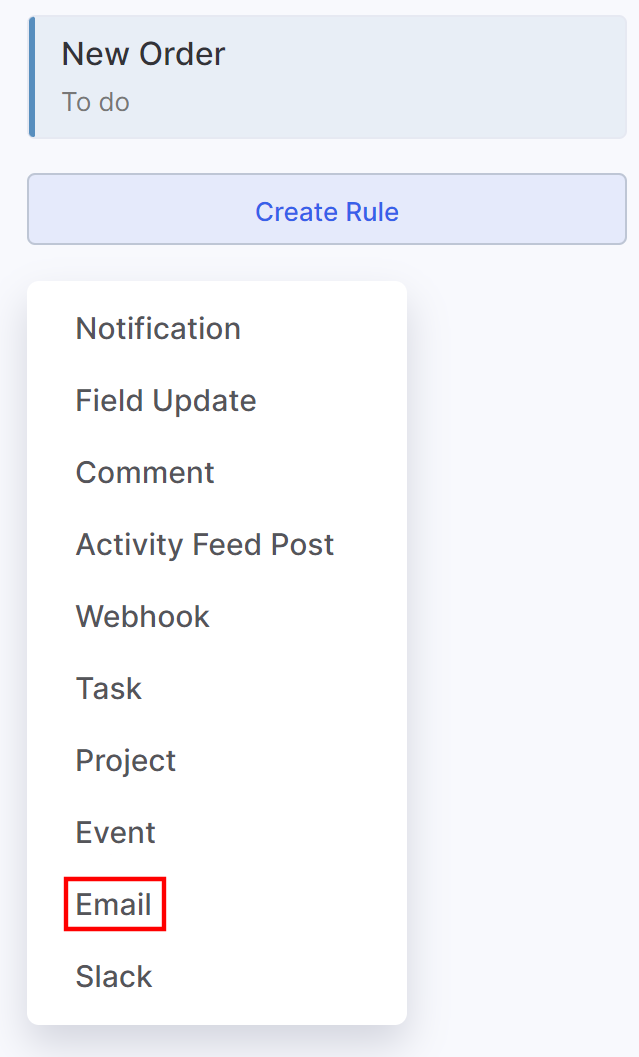
Action: Send Email
Please note that you should have at least one synced mailbox to use this automatic action. The messages will be sent from this connected email.
1. To send an email automatically, click the "Create" button and select "Email."
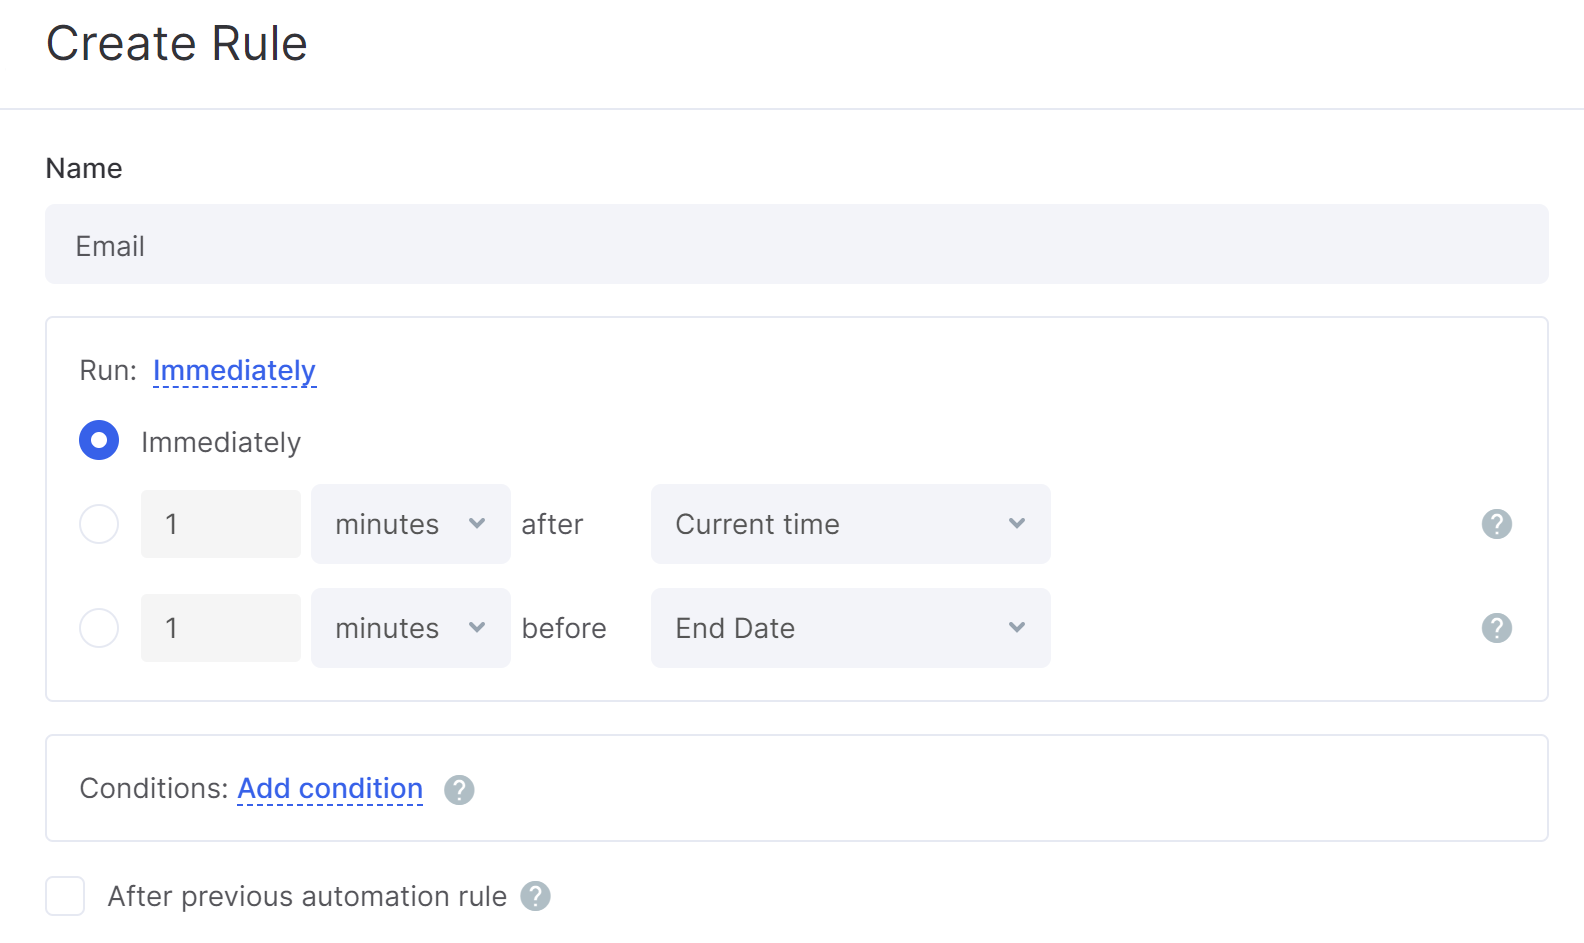
2. Enter a name for your automation. This should briefly outline your automated action. For example, "Email to the Customer". It will be displayed on the automation board.
3. In the Run field, choose a time when specific action (sending notification) will occur:
- Immediately. The automation rule is run immediately after the stage/status change.
- X minutes/days/hours after the Current time, End Date or the Start Date, Created and Modified, as well as Completed and Opened dates for tasks. For example, the notification is to be created in 5 days after the current time.
- X minutes/days/hours before the End Date or the Start Date. Automation is run the specified number of minutes (hours, days) before the specified date. For example, the notification is to be created 1 day before the opportunity end date.
- Exact time — select the Start date or the End date, Created and Modified, as well as Completed and Opened dates for tasks. The automation is run exactly at a specified time, for example, on the task deadline.
4. Add the condition that must be met for your rule to continue running. To create a condition, select an opportunity field and custom values for the condition. Learn more.
5. After previous automation rule. You may set up the sequence of automation rules. This option empowers you to create a sequence of actions when your rule shouldn’t be run before the previous rule is applied.
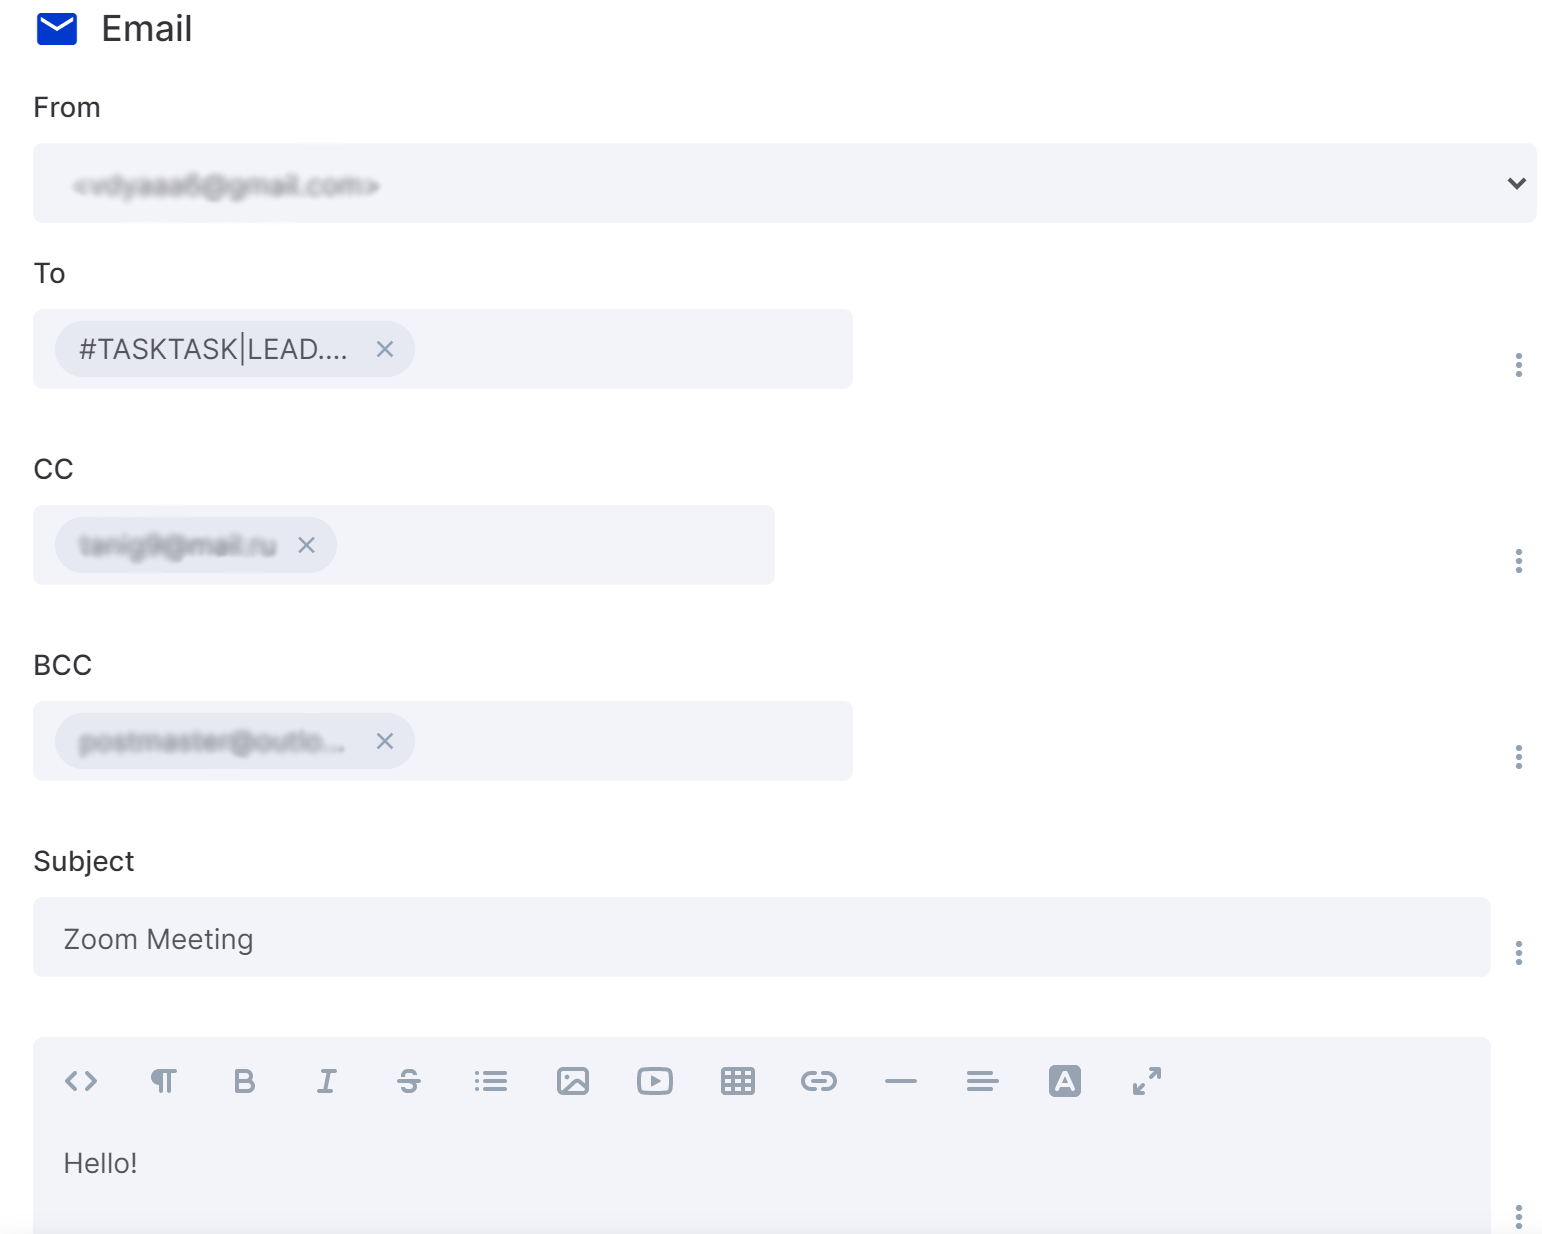
6. Select a sender if you have several email accounts available.
7. Specify the recipient and add CC or BCC if needed. Use variable, to automatically place the email of a linked CRM contact.
8. Enter the subject line and a description. In Flowlu, you can automatically replace data with information provided in the opportunity/task, by which this email will be created. To do it, use variables that can be found by clicking on "three dots" button on the right. All main fields of the opportunity/task as well as custom fields can be used in the variables.
9. Select Save to apply your changes.
