

Connecting Claude Desktop to Flowlu
Requirements
Before you begin, make sure you have:
- Claude Desktop. Download and install the app from the official website.
- Node.js. If Node.js isn't installed on your computer, download and install it from the official website.
- Flowlu API key. You can read about how to create one in this article.
Setting Up the Connection
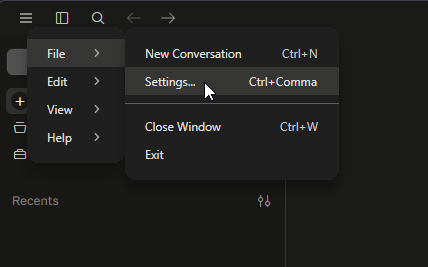
Go to Settings ☰ → File → Settings
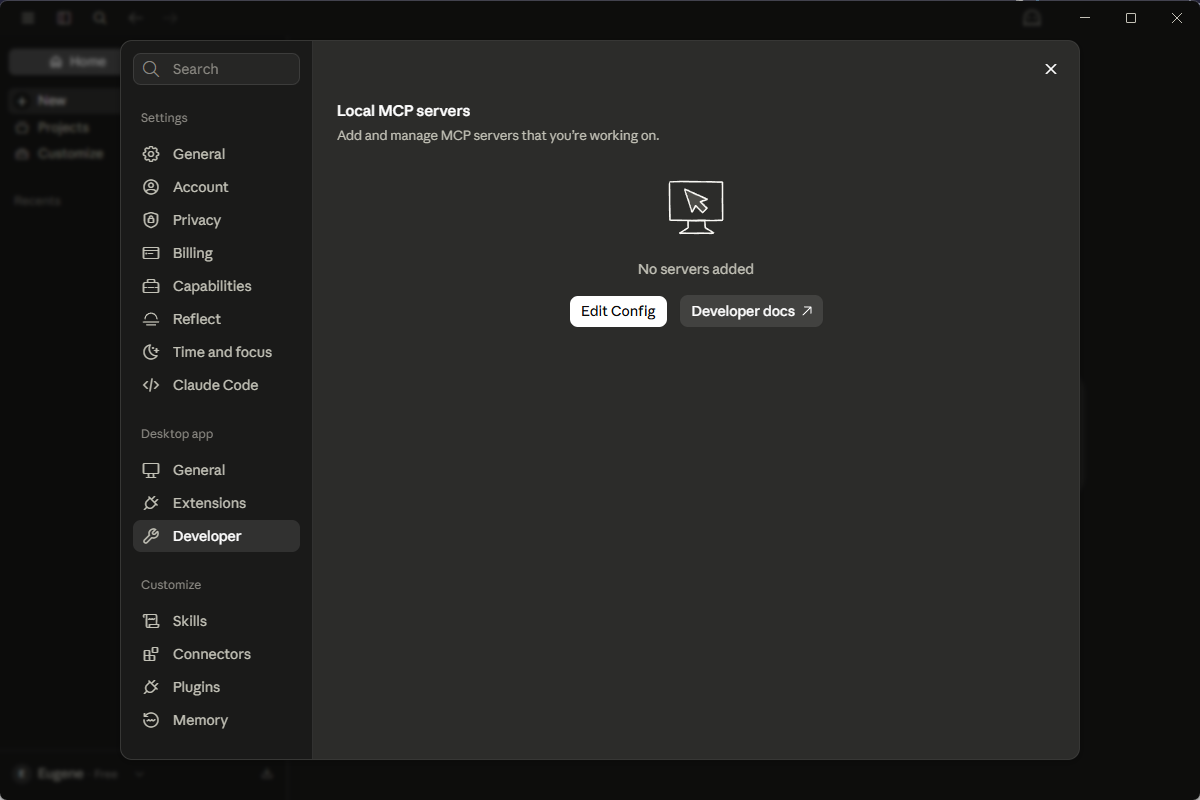
Select Developer in the left menu and click Edit Config:
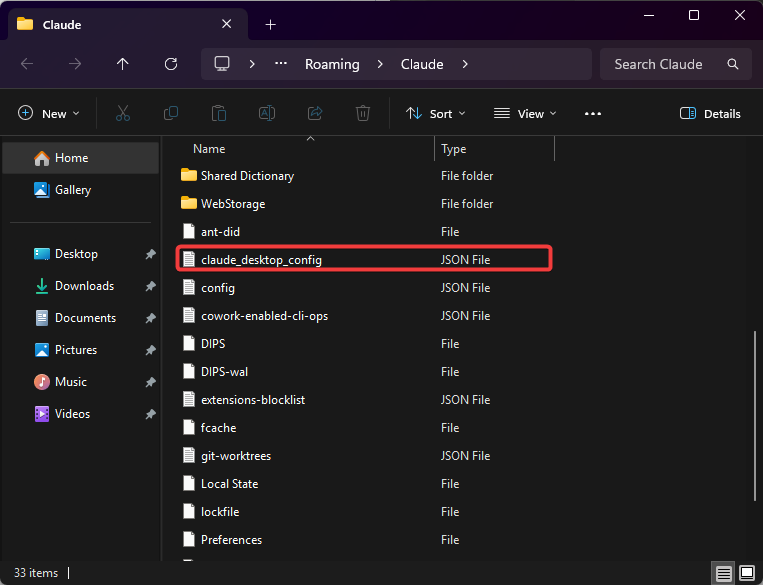
A folder with with claude_desktop_config.json will open, open this file in any text editor, such as Notepad or TextEdit.
In this file, insert the following lines right after the first opening bracket {
  "mcpServers": {
    "flowlu": {
      "command": "npx",
      "args": [
        "-y",
        "mcp-remote",
        "https://mcp.flowlu.com/mcp",
        "--header",
        "Authorization:${AUTH_HEADER}",
        "--header",
"x-account-code: <Account code>"
      ],
      "env": {
        "AUTH_HEADER": "Bearer <API-key>"
      }
    }
  }
You will need to replace two values here:
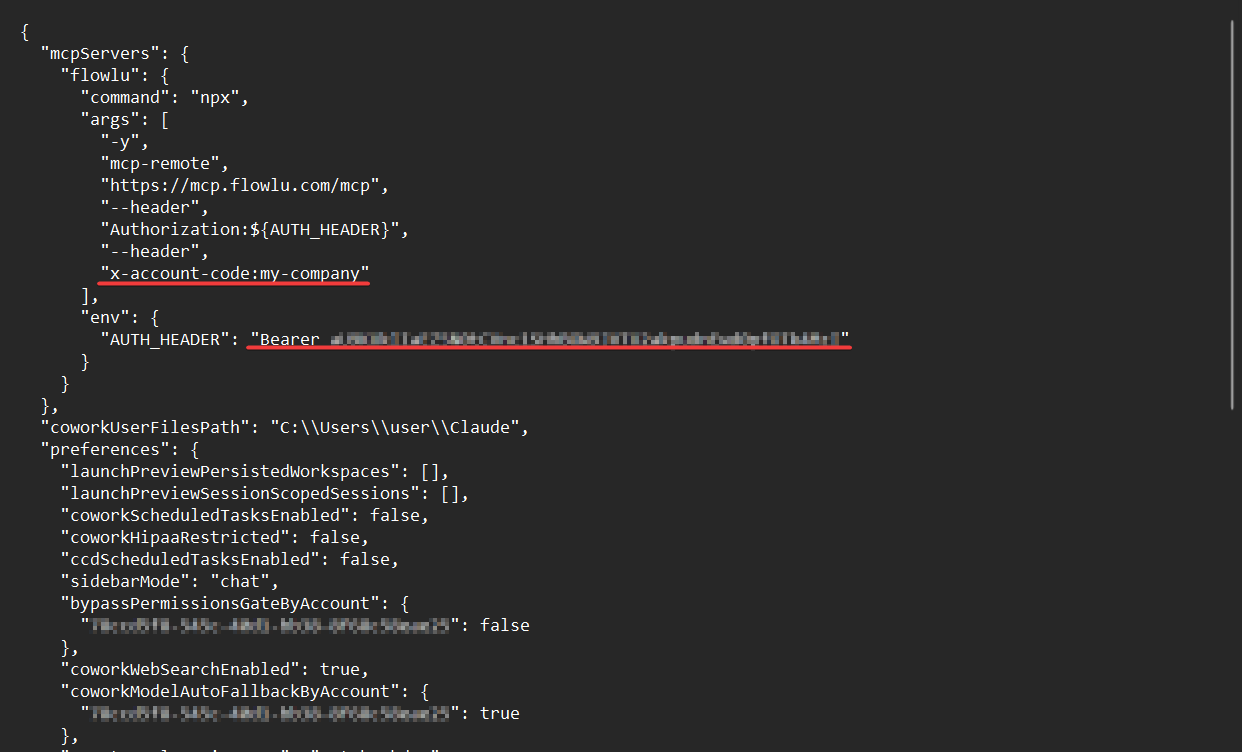
< Account code > — your account's subdomain. For example, if your account address is my-company.flowlu.com, the account code is my-company.
< API-key > — the API key you've previously created.
Note: You don't need to edit other attributes. Pay attention to the syntax, the final code should not contain any extra characters (including < and > signs).
Here's an example of what the file contents will look like:
Save the edited claude_desktop_config.json file, then restart Claude Desktop.
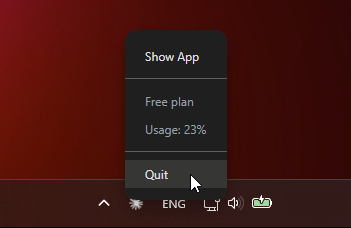
Note: make sure the app is not running in the background, find its icon in the system tray of your taskbar, right click on the Claude Desktop icon and click Quit.
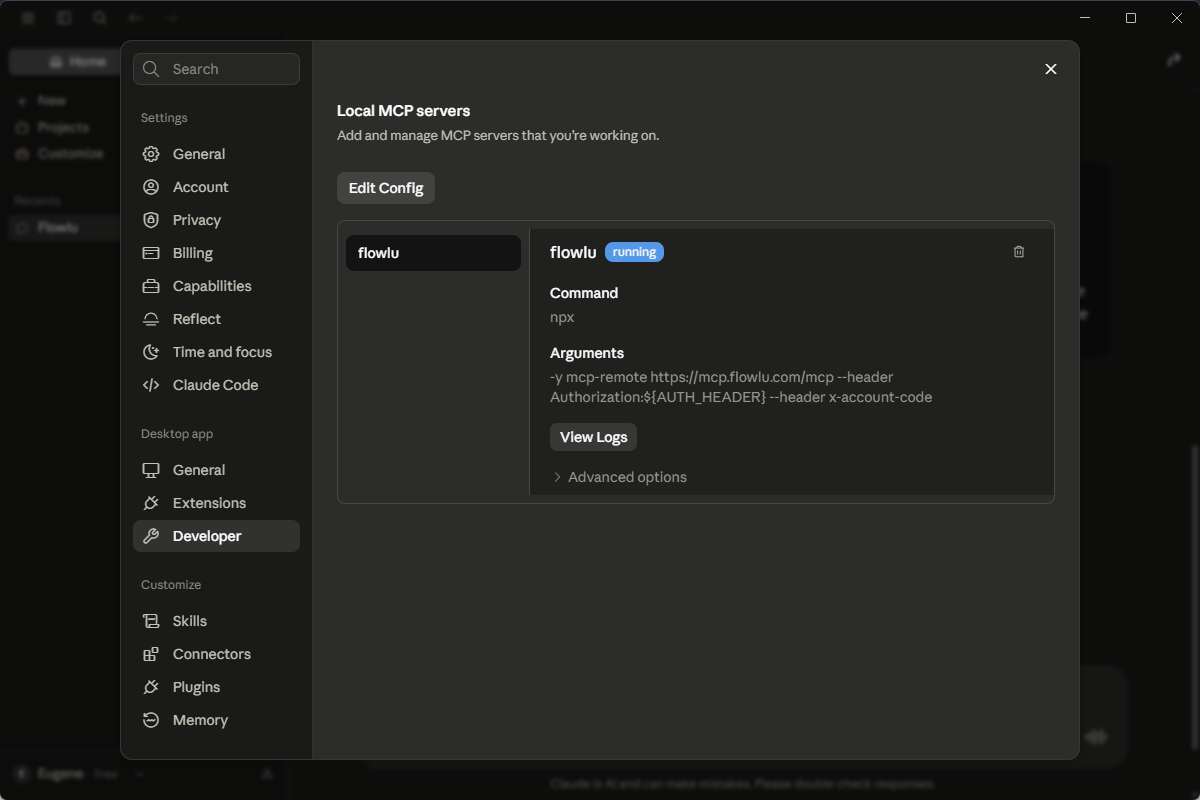
If everything is set up correctly, you will see flowlu added to the list of Local MCP servers in Claude Desktop Developer settings:
All done!
Claude is now connected to your account. You can use it to work with your data directly from Claude Desktop.
