How to Connect Messengers
The Communications module ensures integration between Flowlu and external messaging apps, so you can receive and send messages from the system without switching apps.
Currently, Flowlu supports Viber and Telegram integrations. The list of available integrations will be expanding.
Creating a New Integration
Step-by-step integration guides are explained in the detailed articles for each messenger:
However, all integrations have similar tools to manage communication with clients.
Managers Queue
Each integration can have its own automated manager queue. If a person contacts you via this integration, a new chat will be assigned to the manager who is first in the queue. If the queue is empty, new chats will be marked as "unassigned" but you can always assign them to managers later.
Example: as shown in the screenshot below, we have two managers in the queue. It means that the first new chat will be automatically assigned to Barbara. The second one is for David, while the third is for Barbara again.

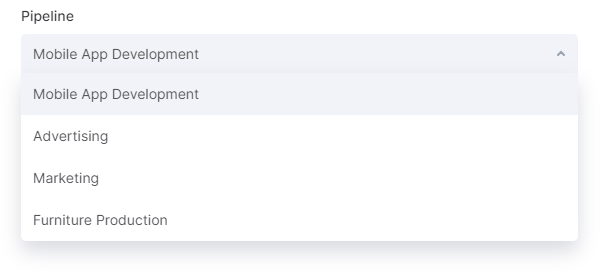
After the queue, you can set the pipeline to which all opportunities created with chats will be taken. For each chatbot (integration), you can set separate pipelines.
Auto-replies
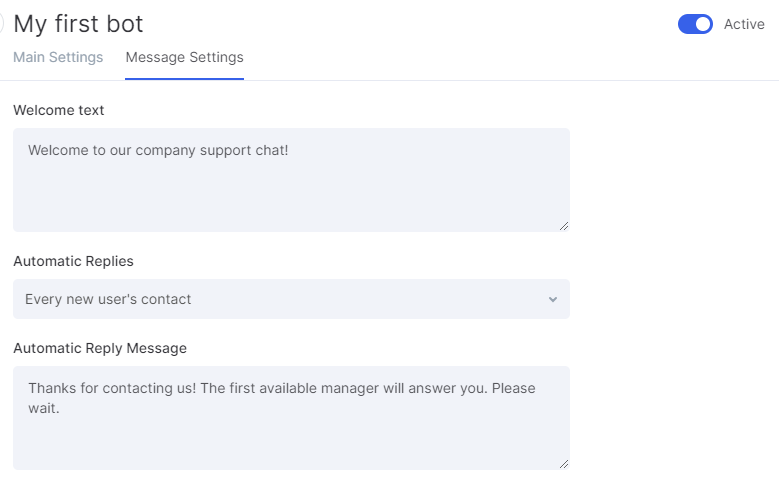
When the bot is created, you can set up automated replies and welcome messages. To do that, find the chatbot you want to set automated replies for and click on it.
In the Messages Settings tab, you can set the following options:
- Welcome text — automated message sent when the user contacts you for the first time via the chatbot.
- Auto-reply message — automated message sent when the user starts a conversation. Triggers when the person texts you for the first time or reopens the closed chat.
"Customers" tab in the Built-in Messenger
When the Communications is installed, you can see the Customers tab in the built-in messenger next to the Team tab. All chats from external apps are in this tab.
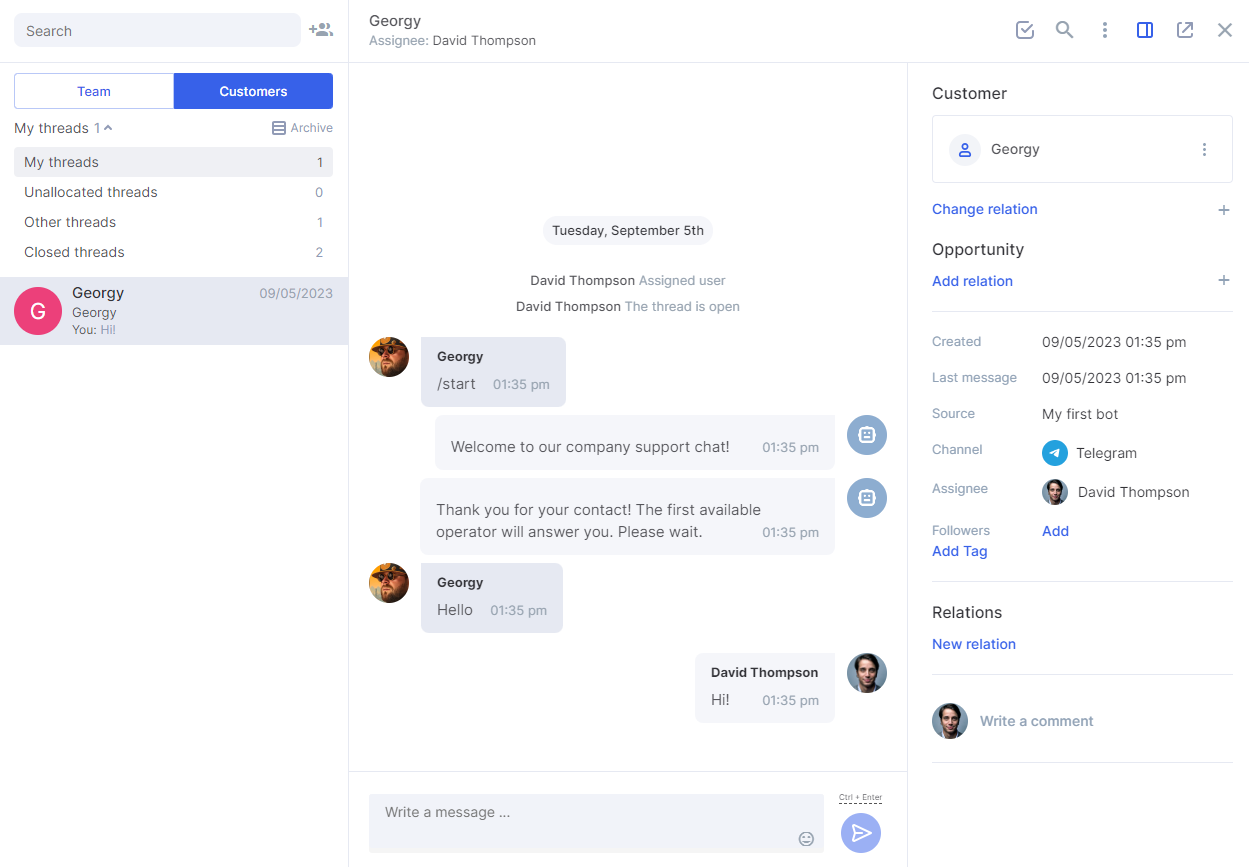
Let's take a look at each block of the messenger:
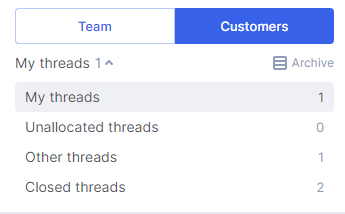
My threads block shows all chats from external apps. Depending on its status, each chat is placed in a certain group. Currently, there are the following groups:
1. My threads. In this folder, you can see all opened treads assigned to you.
2. Unallocated treads. This group contains all chats without a manager assigned.
3. Other threads. This group shows chats assigned to other managers.
4. Closed threads. This tab shows all chats that are marked as "Completed".
Closed chats can be reopened manually or automatically. If the client texts you again, the chat reopens automatically and is assigned to the same manager as before.
The Archive button takes you to the full list of chats. It's helpful when you need to find chats based on certain filters.
All communication with clients happens in personal chats. Here you can see all communication with the client: messages, managers' replies, and all changes made for this chat (opened, closed, reopened, etc.).
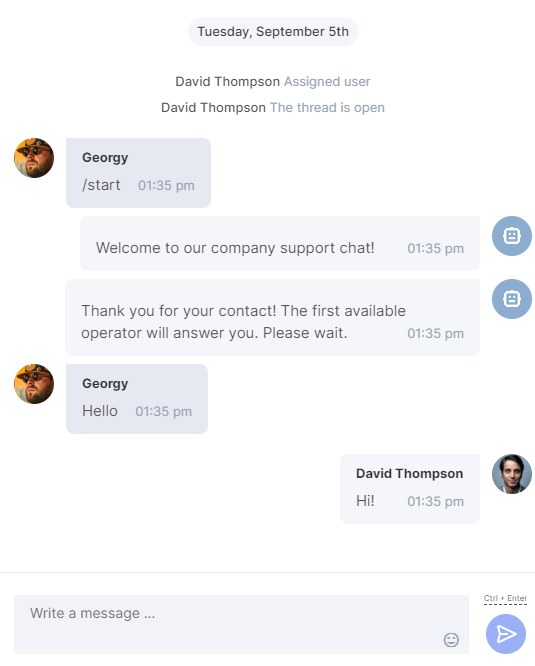
In the right sidebar, you can see all information related to this chat and client, including:
1. Related opportunities and CRM contacts. When the new chat is created, it automatically creates a new sales opportunity related to this contact. You can edit it later and add more context to the deal.
You can also create another sales deal from the right-side dashboard. It's useful when a client decides to purchase additional products or services that are not related to the first request.
2. Detailed information about the chat. Start date, last message date, source (bot name), channel (Telegram, Viber, etc.), assignee, follower, and tags.
3. Relations with other entities. Currently, you can link chats to tasks and projects. You can link existing ones or create new ones.
4. Comments from teammates. There is just a simple board with comments from you and your teammates. It's a useful tool to make notes about leads and clients.
Quick Actions
On the upper bar, you can see the list of quick actions.

Each icon has its own action:
1) Close the chat.
2) Search in the message history.
3) Show chat details, enable/disable notifications, assign managers, change followers.
4) Open the information board.
5) Open the chat in the new tab.
6) Close the chat window.
Access Rights
The Communications has the following access types:
1) Administrator. Can see all chats, manage them, send replies, change assignees and followers, link new chatbots, and integrations.
2) Employee. Can see and manage all chats, send replies, assign managers and followers.
3) Follower. Can see only those chats where this user is assigned as the follower. Users with this access type can't manage, close, or open chats, as well as reply to them.

